Showing posts with label Baking. Show all posts

21 September 2014

Photo post: Aussie pavlova!

Before I get into the photo blog...today is the first day in three months that I don't need it wake up at 6am on Saturday! Yay! Love the sleep in. =D

Ok, back to the photo.
Do you know that Pavlova is an Australian dessert? It is similar to a meringue, and the name was named after a famous ballerina. The soft light meringue was like the agile and delicate ballerina. Pavlova was usually topped with fruits and cream.


This was my first ever try on making a meringue. As usual, my egg white beating skills was not very good. My pavlova sank as you can see above. I think I had also baked it on 20 degC too high temperature. So the golden bronze colour, instead of white. But any how, after I put on the decorating fruits, it's all good!


Tada! Haha, looks like a sank boat. LOL. I didn't have the cream, so it looks quite plain. Unlike store bought ones, this is a reduced sugar version, as I did not use the full amount of sugar for making the pavlova. =)

It's a nice try, will have to improve my egg beating skills. 

Any tips on that?

Good night!

Kcan

10 May 2014

Winter meals 1

It's the time of the year where the thick woolen clothing are drag out from the cupboard and the trees turn colourful to show their true colors.


In my kitchen, I will try to cook food that not only helps to keep us warm, but also keeps itself warm through dinner!
Nothing beats having warm food for dinner in this cold freezing night. It can be super annoying having to re-heat the first few dishes that you cook at the end of cooking, cause it had been sitting for too long on the table, or rush n eat the meal, cause the food will gets cold if you are a slow eater like me. 

So last week, I made chicken, leek and potato pie! My secret ingredient for making the saucing for this dish is the: Continental Chicken and corn soup powder!
Just sprinkle the soup powder into the cooked fillings (chicken, leek, potatoes, carrots, corns, veges...) and add some water. It will thickens slightly, making a perfect sauce for this pie.

I pour the cooked sauce fillings into the ramekins cups, cover it with frozen puff pastry, make a few holes on top ( or in my case, carve out the initials of the person), and bake it in the oven!

20 mins later, there it is! YUM!!!


Crispy top puff pastry, with yummy hot fillings inside. I love dipping the crust into the sauce. BEST!


And what's more, the thick ceramic ramekin bowl keeps the pie warm for a long time! Not needed to rush and I can enjoy my yummy pie. *thumbs up*

kcan

27 April 2014

Hay Bee Hiam

On our latest trip to Canberra, we went on a shopping spree to get things we cannot get in Sydney. (Oh yes, there are things that is only available in Canberra!)
The number one thing we wanted was: Hay Bee Hiam!
It had became Eric's number one favorite snack when we were in Canberra. A Vietnamese grocery shop in Dickson sells them for very cheap. But unfortunately, it was sold out that day! >_< the next shipment in was in two weeks time. Ohmy... Should have look at the disappointment one Eric's face! 

So a week past and Eric could not forget the Hay Bee Hiam from Canberra. So during the ANZAC day public holiday, he suggested having hobby baking to spend the day. And what more appropriate to make than his much loved and missed Hay Bee Hiam!


So, first you need the dried prawns. I mixed it with dried prawn skins too. Chop onions, garlic and some chilli padi. I use simple seasoning of sugar, salt and soy sauce. Some people use sambal paste, but I prefer it not so spicy.


Fry the prawns first till fragrant, then add in the garlic, onion and chilli. Fry till the fillings are dry and full of fragrant. Below are the ingredients for making Hay Bee Hiam. 


First, need to cut the spring roll skin into small size. Divide each sheet into 9 squares.
Remember to cover the skins with damp cloth to prevent it from drying!


Now, come to the rolling stage.
Take a tiny portion, about 1/4 of teaspoon or even smaller, and place in the middle of the wrapper.


Fold the sides over and stick it with beaten egg.


Brush more egg wash onto the bottom of the wrapper.


Fold it up to the middle.


Lift up the 'parcel' and using finger, push the fillings down and spread it evening at the base. This helps to get a nice compact shape and allows easy rolling.


Brush more eggs wash on the remaining surface.


Start rolling!


Tada!


And keep repeating till the fillings or the wrapper finished. This is the most time consuming process. Glad that Eric was there to help with the wrapping. We eventually made a production line where he help to pre fill the fillings onto each wrapper, and I fold them into the little rolls.


Here's a bunch of beautiful rolls.


We had left over wrappers. So I mixed some black sesame powder with butter and sugar. And wrapped them up into sesame spring roll! 
They taste so yummy!


Instead of deep frying, I sprayed it with some oil and then baked them in the oven till nice n golden.


There you go, Eric's snacks for the coming weeks!


Kcan

08 March 2014

Flat bread recipe

This is the recipe for the flat bread, taken from the recent summer series of Coles magazine.

I made this in the grill, and am amazed with the balloon-ing of the dough as it cooked. 
Must keep an eye on it, so as it will not get burnt. A food timer is useful to remind you of the baking time. 

As a personal preference, I prefer not to roll the dough too thin, so as to have a more 'Bready' soft bread. If you like the thin crispy like flat bread, roll out the dough thinly. Keep the cooked bread in a foil lid to keep warm n also to allow the moisture to softens the bread. I find very thin bread can be hard n chewy if you are just eating it plain. 
This bread goes well with curry or saucy dish.


Enjoy! And let me know how it went!

Kcan

07 March 2014

Day of baking

It's a warm day today, a good relief from the many days of rain and clouds. Needed the sunshine to dry the accumulating laundry from last week.

With this warmth, why not do some dough proofing!
I recently found out that bread dough can be frozen in freezer, for future baking needs. Which means I can pre-made the flat bread dough, let it rise once, separate it into the portions, and then individually wrapped in glad wrap and freeze in the freezer. When I want to use it I took the amount I need a few hrs ahead and defrost on room temperature ( or overnight in fridge), let it rise and tada! I can bake a fresh bread again in no time! And I loves this flat bread recipe as I can quickly bake it on the grill for 45 seconds on each side and it's done! Wow! Even quicker than preheating the oven!

And while I was at it, I make some quick scones, so that I can use up the fresh cream I bought last week. 


Now, all ready for baking.


Scones with fig jam and cream. 

Yum.

Hope you have a gd day!

Kcan

02 March 2014

Flat bread

I recalled seeing a recipe on making flat bread on the Coles magazine recently and wanted to make it.

Here it is! I was so amazed that it will puff up like a balloon itself!


Yummy! Just nice to have it with the left over curry.

Kcan

29 January 2014

The bake-off

Chinese New Year is around the corner! And I miss my mum n her cooking! =( 

Feeling sad that this place is still quite messy and little improvement don't seems to matter as the de-provement are more apparent. *sigh*

Anyhow, because i missed my mum's cooking, plus cny is coming plus this church friend of mine who started my temptation on pineapple tarts, I decided to make my own too!
But guess what! Mum is uncontainable in Malaysia. >_<. There goes my recipe. 

However, I stumble across a blog on Sunday, which featured a pineapple tart recipe! Melt in your mouth pineapple balls. =D 

So here it is!

Bought this big baby from the supermarket for $5. Weigh about 1.7kg.


After skinning and de-core, left only 700g. 
Put it through the blender to mash it up. Then sieve out the water from the pulp.


Measure the sugar for the paste.


Cook the pulp on the left, heat up the juice from the pineapple.


Mix sugar, and after cooking for 1 hr.... Here it is!


Mixing the short crust dough. Oh my, lots of butter!


The making stage: weigh n roll the cooled pulp into balls.
Does the same of the dough.


Combine and here you have it! Ready to bake.


Freshly out of the oven!

One mouth full. Yum!


Still miss the times making the pineapple tarts with mum. Sad that no one helped me when I make it. They only know how to 'siam' (disappear) and eat.

Kcan


16 January 2014

Bready is working again!

For many months, our dear Bready is out of action, because we lost the kneading blade during our renovation! >_<

It took us many months to find it and later contemplating whether to replace it, or buy online or.....

So in the end, we finally got a replacement blade before Christmas. However, lazy me did not feel like baking (weather so hot!), so Bready had a long holiday till, Yesterday!

Coming back from work, it was already 5pm. I had the sudden urge to make pizza with the left over chicken breast from the night before dinner. So I got Bready out from storage and started measuring the four, water, salt....

As time is tight, I put the bowl of dough into my Tomato (car) to help speed up the rising process. (The car was quite warm from being in the sun). And it works! In 25 mins,it had double in size! Yay!


The 'pizza' that I made. The dishes last night were a weird combinations. Noodles, stir fry sweet potato leaves, and stir fry lettuce as the sides, apple soup as the main (prepared by MIL), and pizza.

Thank you Bready for giving us freshly made breads again!

Kcan 

07 June 2013

After dinner dessert- chocolate pudding

We loves to have some sweet treats after dinner in some weeks. Especially after a long hectic day at work, or in Eric's case, at uni.

I only like desserts that are simple n easy to make. Of course, yummy to eat too! 
We came across this a few weeks ago at our local Coles supermarket. Half price! =D

My first time trying out the Greens Chocolate pudding. 
It was for 4-6 servings. So I made 4 as there's only 3 of us at home now. 
The instructions were simple n straight forward. 

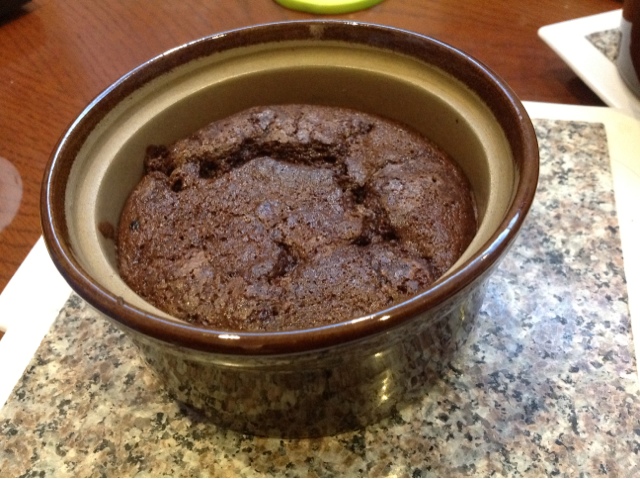
Here's the chocolate puddings, straight out of the oven!

Nice looking cracks in the middle. Looks like a volcano going to erupt. Haha.

Digging into the hot pudding. 

Oh my, the insides were still in liquid form! Just like a chocolate lava cake. *yumm!*


Look at the melting chocolate at the bottom!
Nice and warm for the cold winter nights.


We all finished our share of chocolate pudding and could have no more. 

The puddings were very sweet. So much so that we got sick of eating it after a few bites. So that's why it could have 6 servings.

We kept the remainding pudding in the fridge and had it cold the next day. It tasted like cold custards!

Yumm!

Will try the other Greens products next time they are on half price sale. =D

Kcan

06 June 2013

Black sesame bread loaf

The bread basket  rack was empty again. Thinking what kind of bread should I bake this time, I decided to make use of the well expired black sesame powder belonging to my MIL, sitting in the fridge.

I've been trying out with making white loaf from Happy Home Baking. And this recipe has turned out quite well each time. So I decided to modify it with adding in Sesame powder. (more nutritious than just pure white bread)

This is the white bread recipe, as adapted from Happy Home Baking. I had added and do some changes to the ingredients and methods to modify it to a Sesame bread for baking in my bread maker.


Black Sesame Bread loaf

Ingredients
(makes one 600g loaf)

550g bread flour

50g Black Sesame powder
2 teaspoon instant yeast
2 tablespoon caster sugar
1.5 teaspoon salt
4 tablespoons milk powder
420ml water 
20g butter, soften at room temperature

Method: (I used a bread maker to mix the ingredients and make into a dough) If you don't have a bread machine, READ THE 2ND PART OF THE STEPS)
  1. Add all the ingredients, except the butter, into the bread machine mixing bowl, as according to the steps of adding wet/dry ingredients. Separate the yeast, away from the sugar and salt.
  2. Mix the ingredients in the bread maker dough function for about 5-10 mins till all the ingredients all combined to form a non-sticking dough.
  3. Add in the butter, and continue to use the dough function to knead it for about 30-40 mins. This will incorporate the butter into the dough. 
  4. At the end of the kneading cycle, the dough will no longer sticks to the side of the bowl, and becomes smooth and elastic. To know if the dough is well kneaded through, do a window pane test.
  5. Window Pane test: Pinch a small piece of the dough, pull and stretch it. It should be elastic, and can be pulled away into a thin membrane without tearing/breaking apart. If it is, well done! The dough is now ready for proofing.
  6. Take the dough out of the bread machine mixing bowl and placed into a lightly greased (with vegetable oil) mixing bowl, cover with cling wrap and let proof in room temperature (around 28 to 30 degC) for about one hour, or until double in bulk. (In the cold winter now, I lightly warm the oven to around 40 degC and let it proof in there)
  7. Remove the dough from the bowl and give a few light kneading to press out the gas in the dough. (this will stop having big gas holes in the bread when baked) Smooth into round, cover with a damp cloth or cling wrap and let it rest for another 15-20mins.
  8. Roll the dough into a rectangle on a flat surface. Roll it up Swiss-roll style into a log. Remove the kneading blade in the bread maker mixing bowl. Place the log of dough, seam side down, into the bread maker mixing bowl. 
  9. Now cover with damp cloth or cling wrap and leave the dough to proof for the second time for about 40 ~ 50mins, or until double in size, or when the dough has almost reached the rim of the tin.
  10. Pop the whole bread maker mixing bowl into the bread maker. Set the bread maker into baking mode. Bake for 50 mins.  Remove from bread maker, unmold immediately and let cool completely before slicing.
Kneading by hand.
  1. Mix milk and water.
  2. Stir bread flour, caster sugar, salt, and instant yeast in a mixing bowl.
  3. Add in milk mixture. Mix the ingredients with hand and slowly form into a dough.
  4. Transfer dough to a lightly floured work surface. Knead until the dough no longer sticks to your hand, becomes smooth and elastic. This should take about 20 mins. Do the window pane test: pinch a small piece of the dough, pull and stretch it. It should be elastic, and can be pulled away into a thin membrane without tearing/breaking apart. Wrap the butter in the dough and continue to knead until the butter fully incorporates into the dough.
  5. Place dough in a lightly greased (with vegetable oil) mixing bowl, cover with cling wrap and let proof in room temperature (around 28 to 30 degC) for about one hour, or until double in bulk. (In the cold winter now, I lightly warm the oven to around 40 degC and let it proof in there)
  6. Remove the dough from the bowl and give a few light kneading to press out the gas in the dough. (this will stop having big gas holes in the bread when baked) Smooth into round, cover with a damp cloth or cling wrap and let it rest for another 15-20mins.
  7. Roll the dough into a rectangle on a flat surface. Roll it up Swiss-roll style into a log. Place the log of dough, seam side down, into a well greased pullman tin (or a bread loaf tin).
  8. Now cover with damp cloth or cling wrap and leave the dough to proof for the second time for about 40 ~ 50mins, or until double in size, or when the dough has almost reached the rim of the tin.
  9. Baked in pre-heated oven at 180 degC for 30-35 mins or until golden brown.  Remove from owen, unmold immediately and let cool completely before slicing.
When the bread had cooled down, I like to wrap it in a tea towel to keep it fresh. But If you are in a humid area, I think it will be best to keep it in an air tight container. Home make bread can last for 3 days, though it is best eaten on the day of making. They tend to gets dryer as time goes by too.


Serve with butter and a good cup of coffee. Yum!


Eric and I had lunch that afternoon with toast with Egg n Onion Omelette. Delicious~!
Happy baking!
kcan 

29 May 2013

From the oven

During the days which I am sick of cleaning up the place, I switch instead to things which I love. Baking. 

Well, this is something which I had grew to liking only this year, as I hated the cleaning up from baking, unlike cooking. Anyhow, sister Grace had bought this big bag of bread flour from Costco. So I guess I had to bake something out from it, seeing no one does any baking here. 

Baking bread was always something I fear, for I knew how bread will turn out if not done properly. Rock hard, dry, dense and some can be so tough that it can bounce! haha. Still had vague memories of my mum baking bread back in Singapore. Oh how unfortunate lucky honoured to be the guinea pigs to tough rock hard saussage rolls. LOL. Using yeast in baking was always something of a mystery to me. How much yeast to add, how long do I leave the dough to proof, how to make the bread soft.... 
These were all questions which I had. And last of all, the kneading. I hate having stickiness mess all over my fingers!

Eric bought a bread making machine last year when we were in Canberra. That was after having the privilege of having homemade fresh bread during our honeymoon at one of the destination. And ever since then, we missed the taste of freshly toasted bread in the morning. But making bread on our own is not easy. It does not meant that you now just chuck everything into the bread maker, wait 3 hrs and Tada! you have a bread. 
Nonono. *wave finger*

So many mornings we woke up in the cold morning frost in Canberra, only to find out that the dough was not properly mixed or that the dough did not rise, or it had over proofed and  sticks onto the lid. The worst disaster was when Eric miscalculated the measurement for making a raisin toast. Ended up the dough proof too high, blocking the nut drop box, where the raisins were kept. And so the raisins could not drop into the dough and it melted all around the box when it baked. >_<

So this year, I wanted to learn from the Masters!

And I went to Mr Google again. And I'm happy to have found a good teacher. Her blog is HappyHomeBaking.

Here's what I've started making:

Homemade Char Siew Bao (baked)
My little babies baking in the oven.
 All ready to cool down on the rack.
Sorry no pictures of the inside, as it was all gone in minutes! >_<

Another of my favourite. Cinnamon Scrolls!
YUMMM.
 Cinnamon + sugar+ butter = YUMMY!
 I've always wanted to bake a loaf bread.
As the recipes allows me to make a nice soft textured bread, I've decided to venture out into making something of a loaf shape. Can last longer too. haha.

My Macha Redbean loaf.
 It's green! I used the left over Red bean from ages ago. It turns out good. =)


The problem with baking soft fluffy bread, was time. It takes 4 hrs from starting to end. Needing to proof a few times for an hr at times each. There was a few times I had to stay up late at night to wait for the bread to finish baking and then leave it out to cool before wrapping it in a tea towel. The winter cold is not helping too, as it will take longer for the dough to proof. So I had set up a warm spot in the oven to proof my dough. And there were so many times I had silly-ly walk way while re-heating the oven, only to forgot the time and had to run rush back and turn off the oven, open the door, cool the dough out... so as not to kill the yeast. >_<


Thank you Happy home baking for the wonderful recipes. Now a days, I'll go to her blog to look at recipes to bake. =)
Can't wait for more yummy bread for breakfast!

kcan